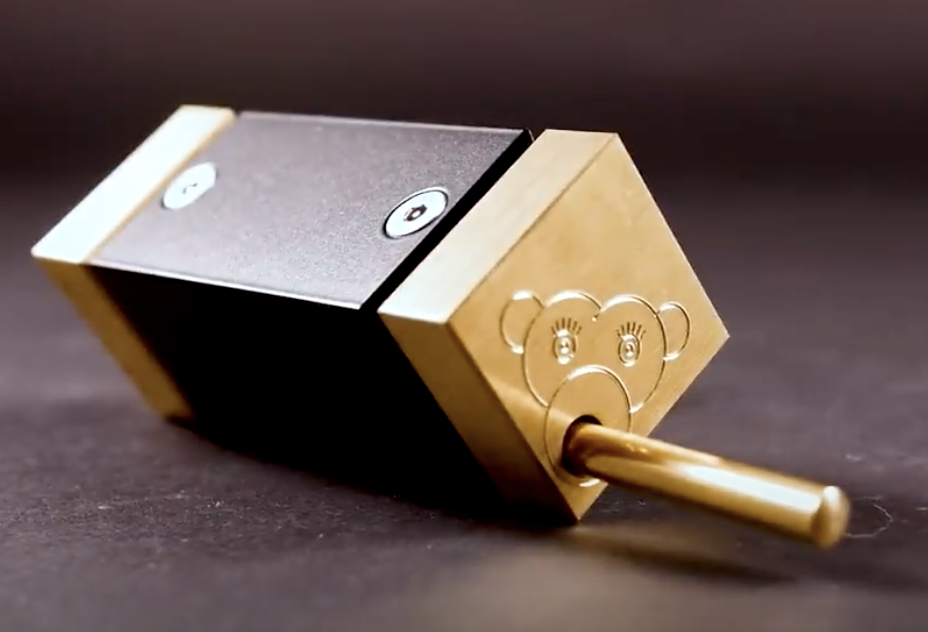
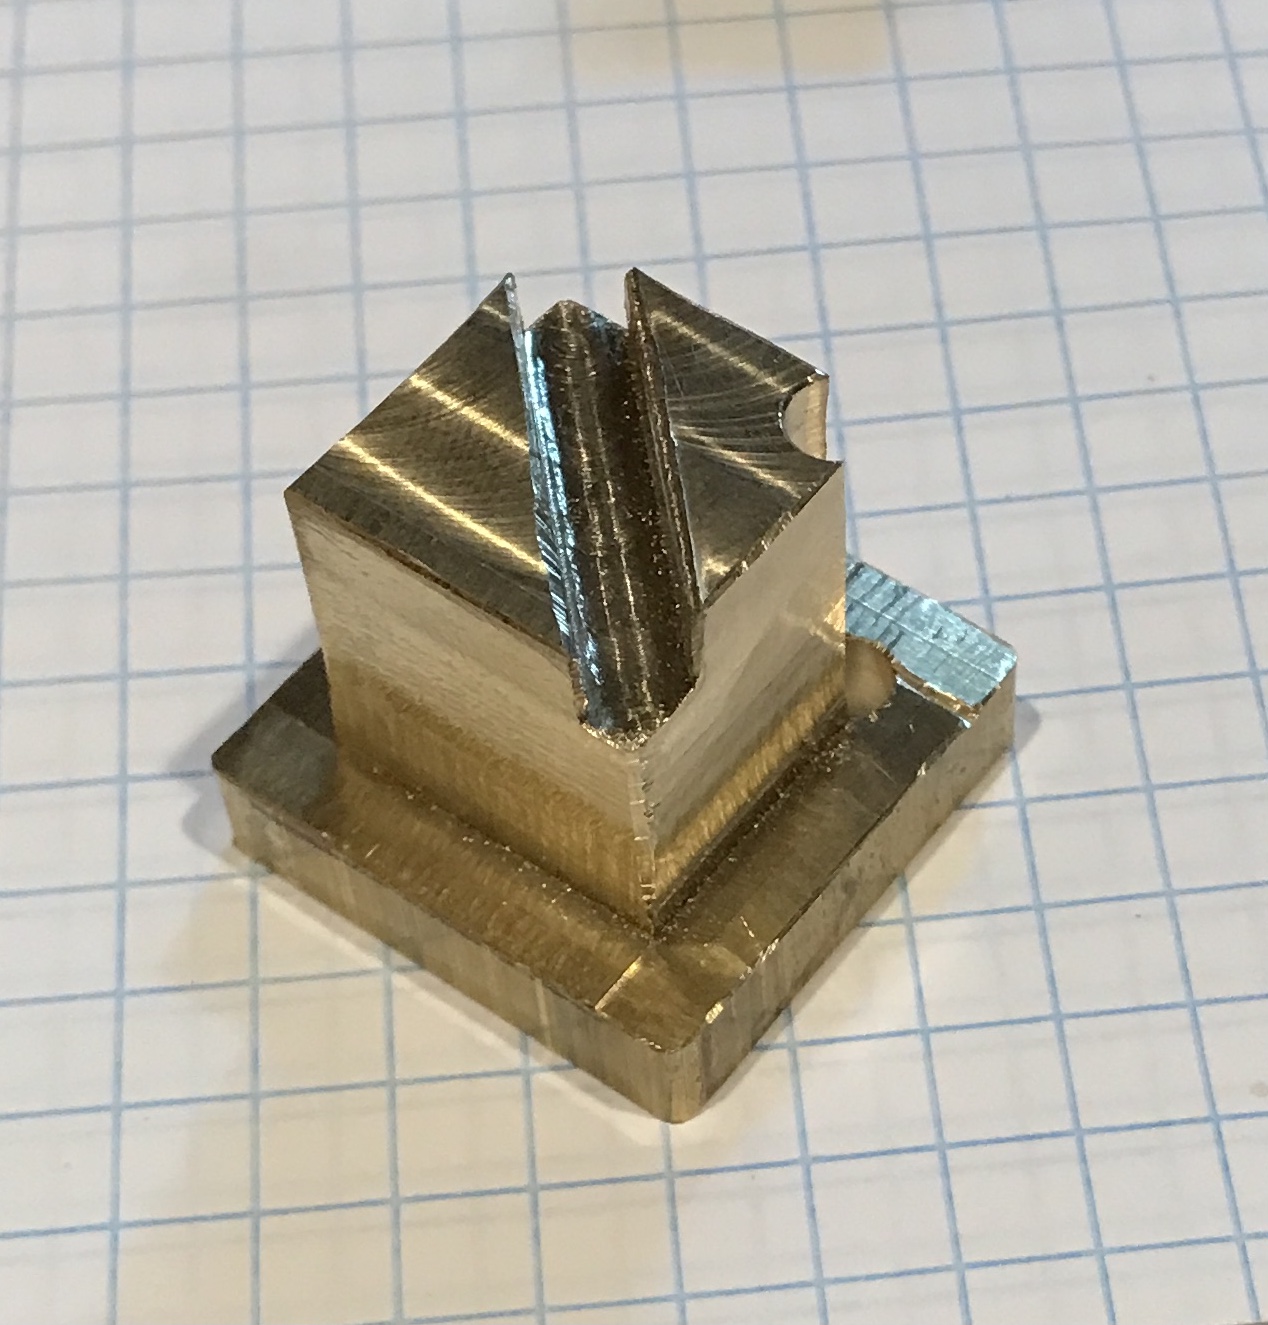
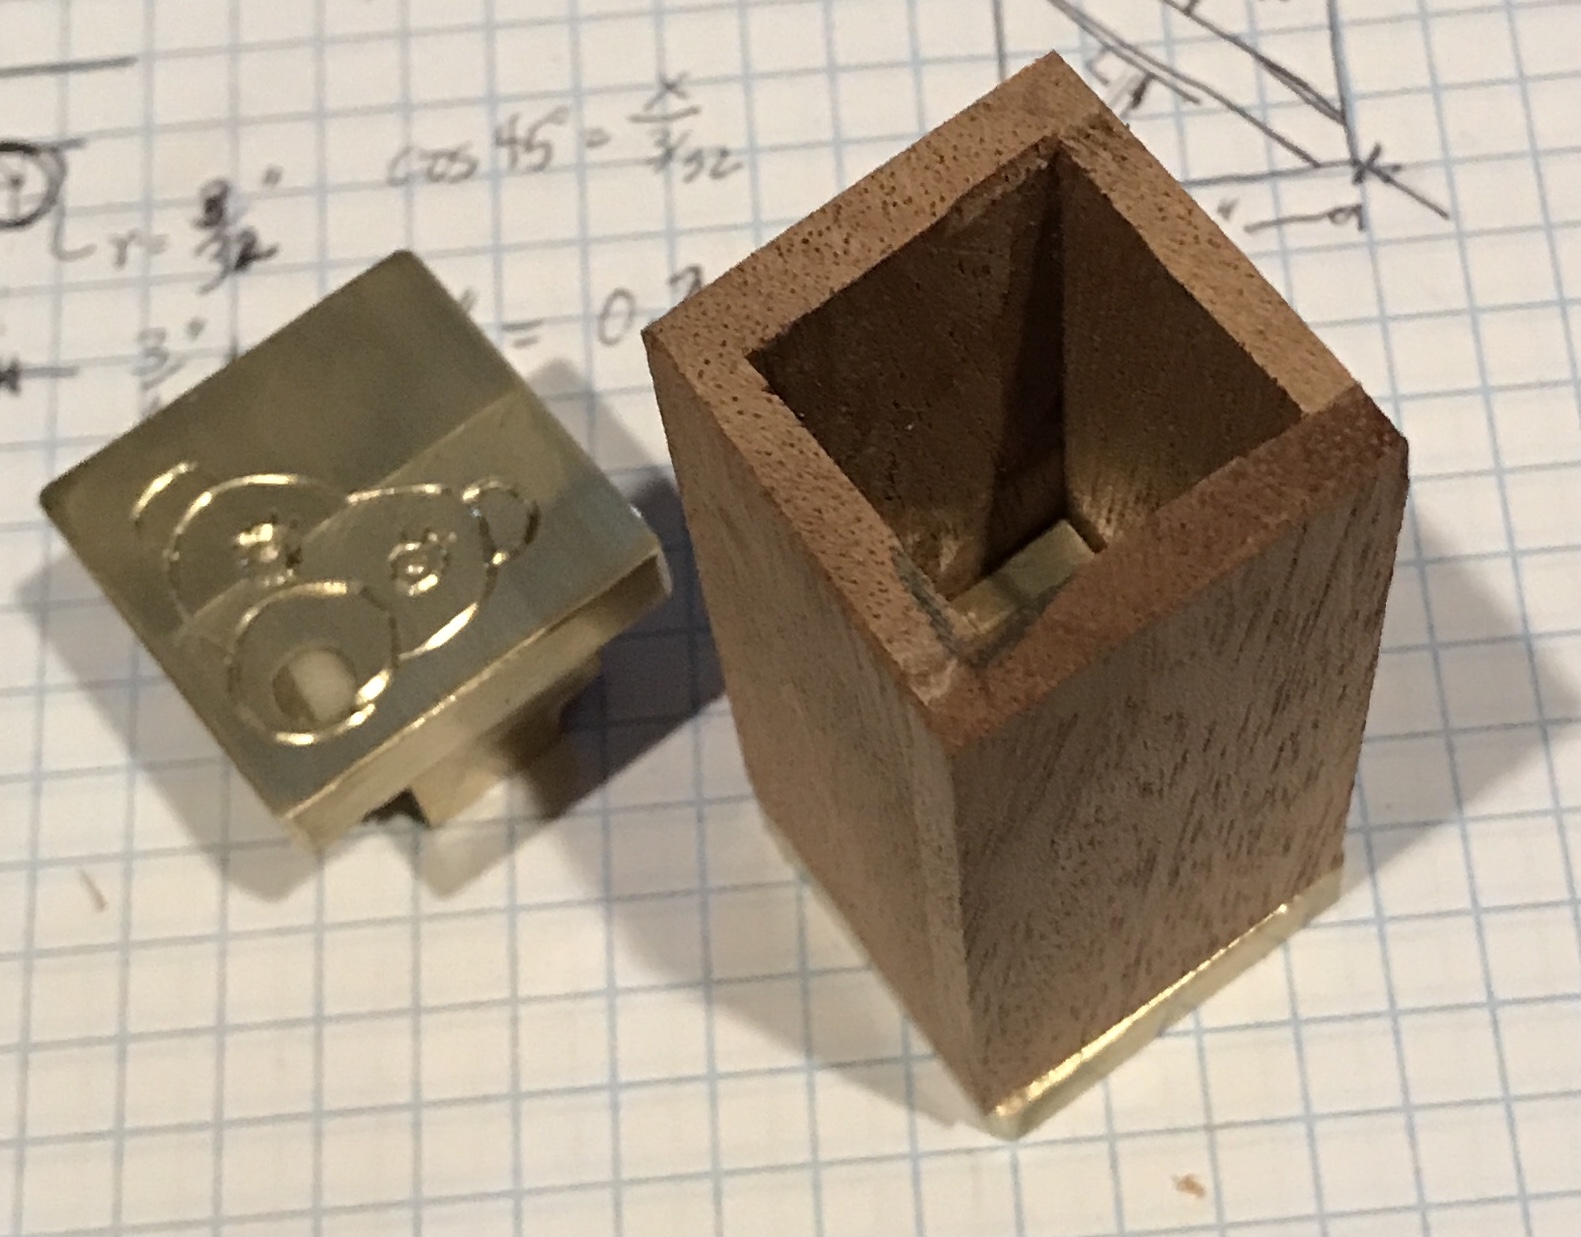
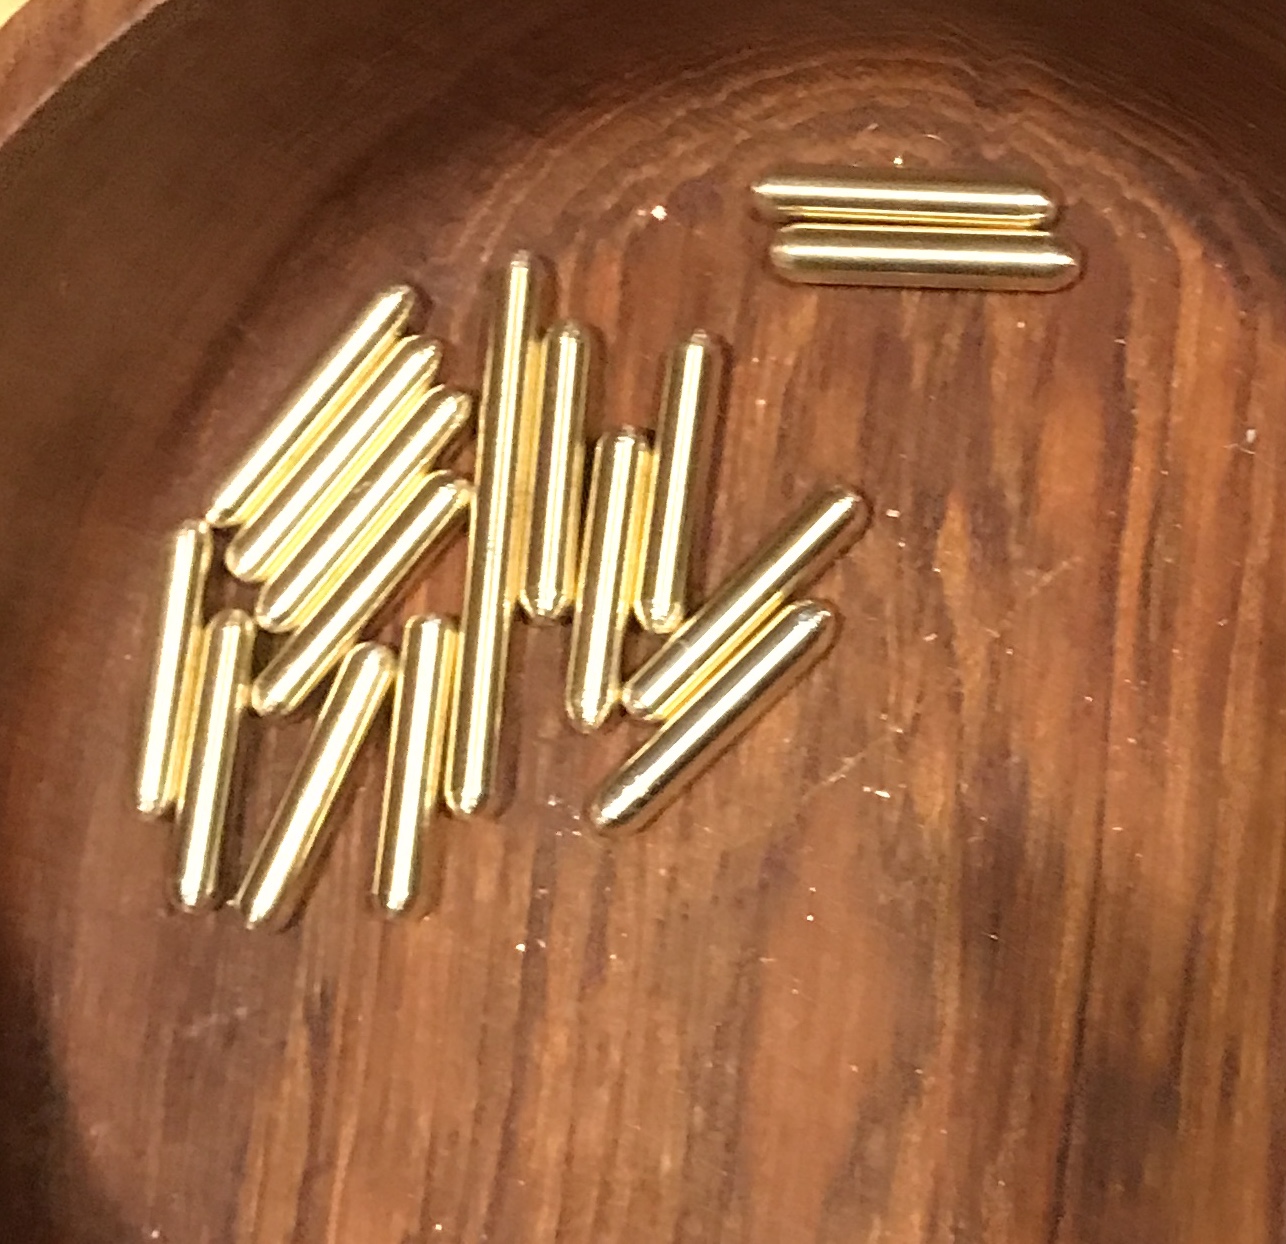
Mr. Puzzle featured a puzzle called Feed the Monkey two years ago. This morning I began reproducing this puzzle. The puzzle consists of trying to insert 17 rods into the opening in the top. The rods are 1" long except for the last which is 2" long. The storage within the box is only sufficient to hold 16 rods side-by-side, which brings up the hidden trick. The photos below show the puzzle and the spot for hiding an extra 1" rod.
The puzzle is to be constructed from brass and wood. The ends will be made of brass and the box in the middle of wood. I found a 1 1/8" bar of square brass. Two pieces 1 1/8" long were cut off with the bandsaw. These were squared up by clamping them to an angle plate, making sure the free side was square to the table and cutting with the two flute cutter. The opposite face was squared relative to the just cut face in the vise. Both blocks were faced to 1.01".
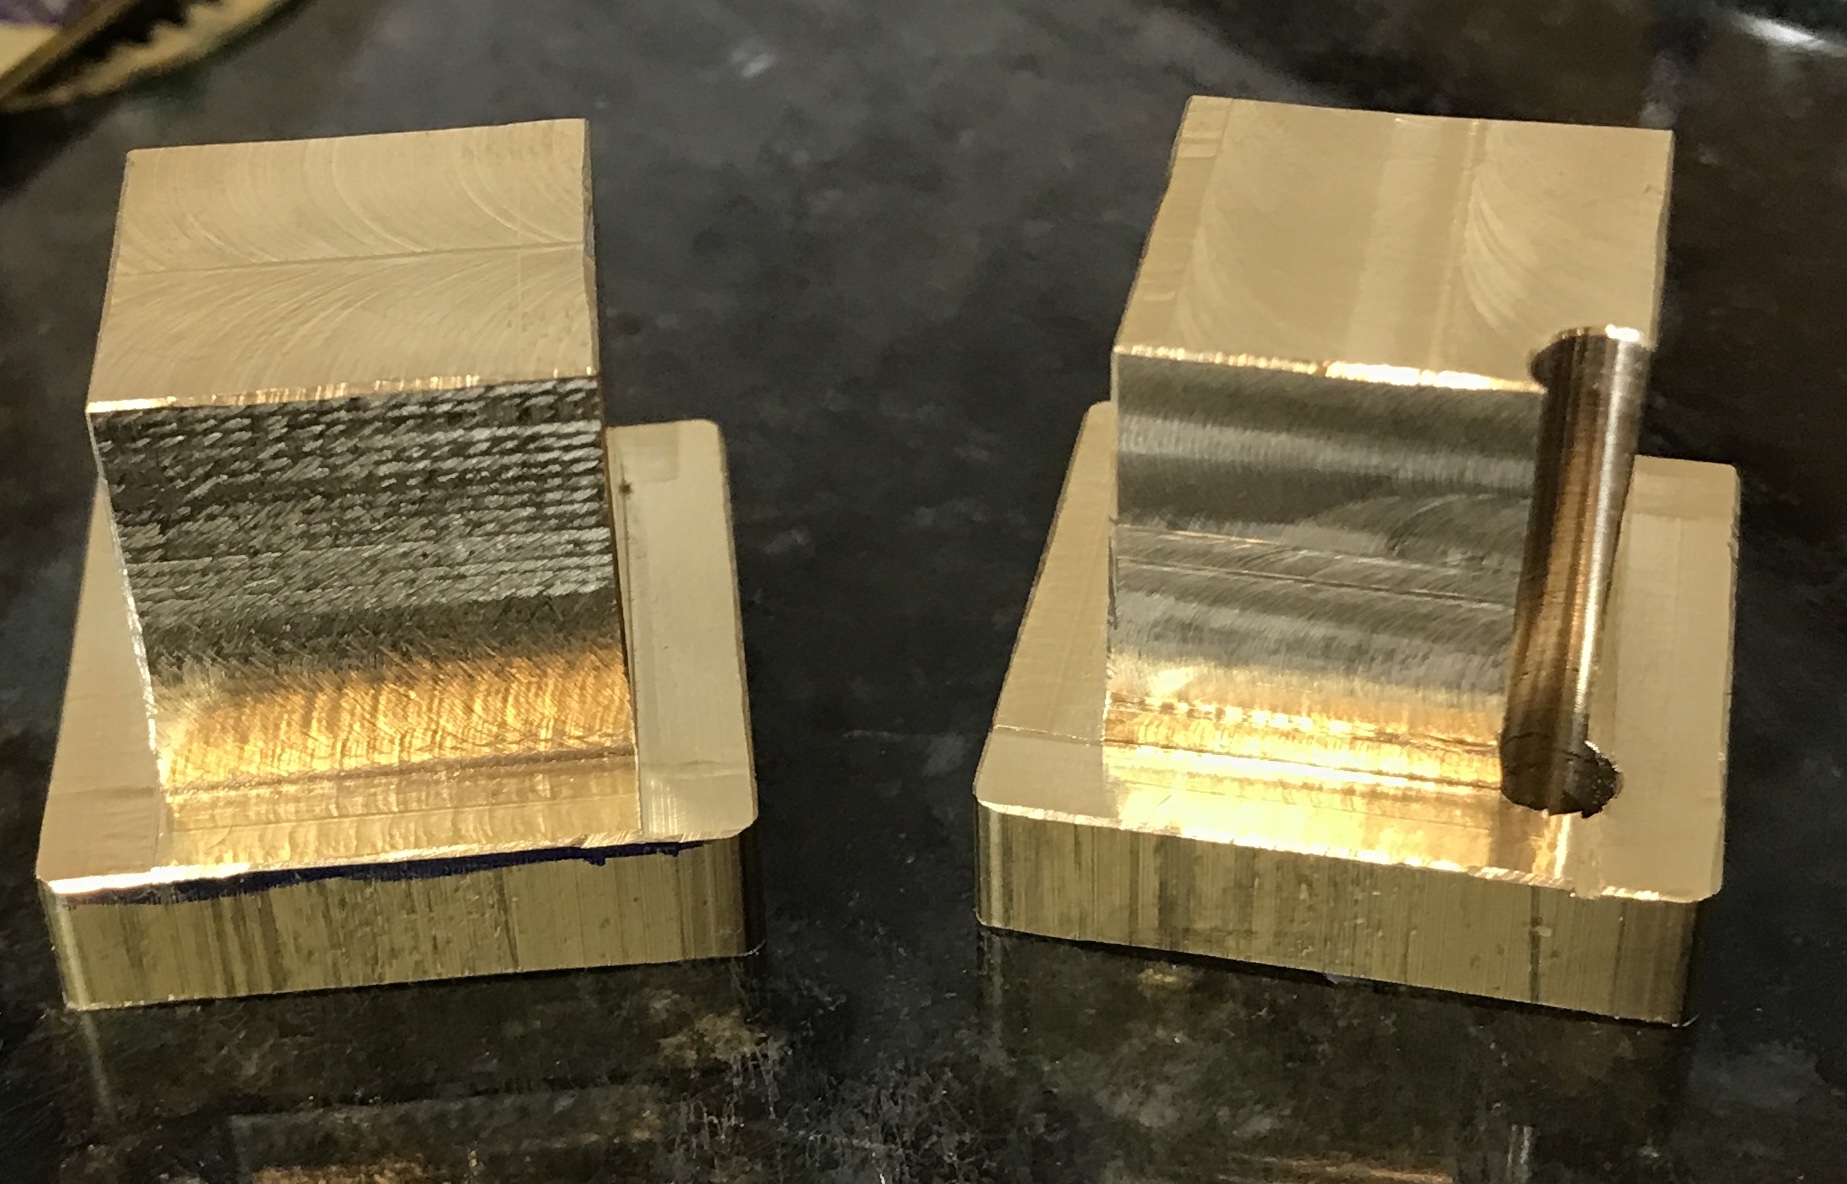
The next step is removing most of the sides to produce a lip all around the two cubes. The two cubes were held in the vise. A slip of paper was used to shim one block. It is about 0.001" shorter than the other. About .20" was milled down in increments of 0.020" with a 3/8" four flute end mill. The rabbet was milled to a depth of 0.184". This rabbet was then widened to 0.750" in increments of 0.025". The milling proceeded smoothly with no chatter and minimal noise. The photo shows the completed side on both blocks. Three more sides to go.

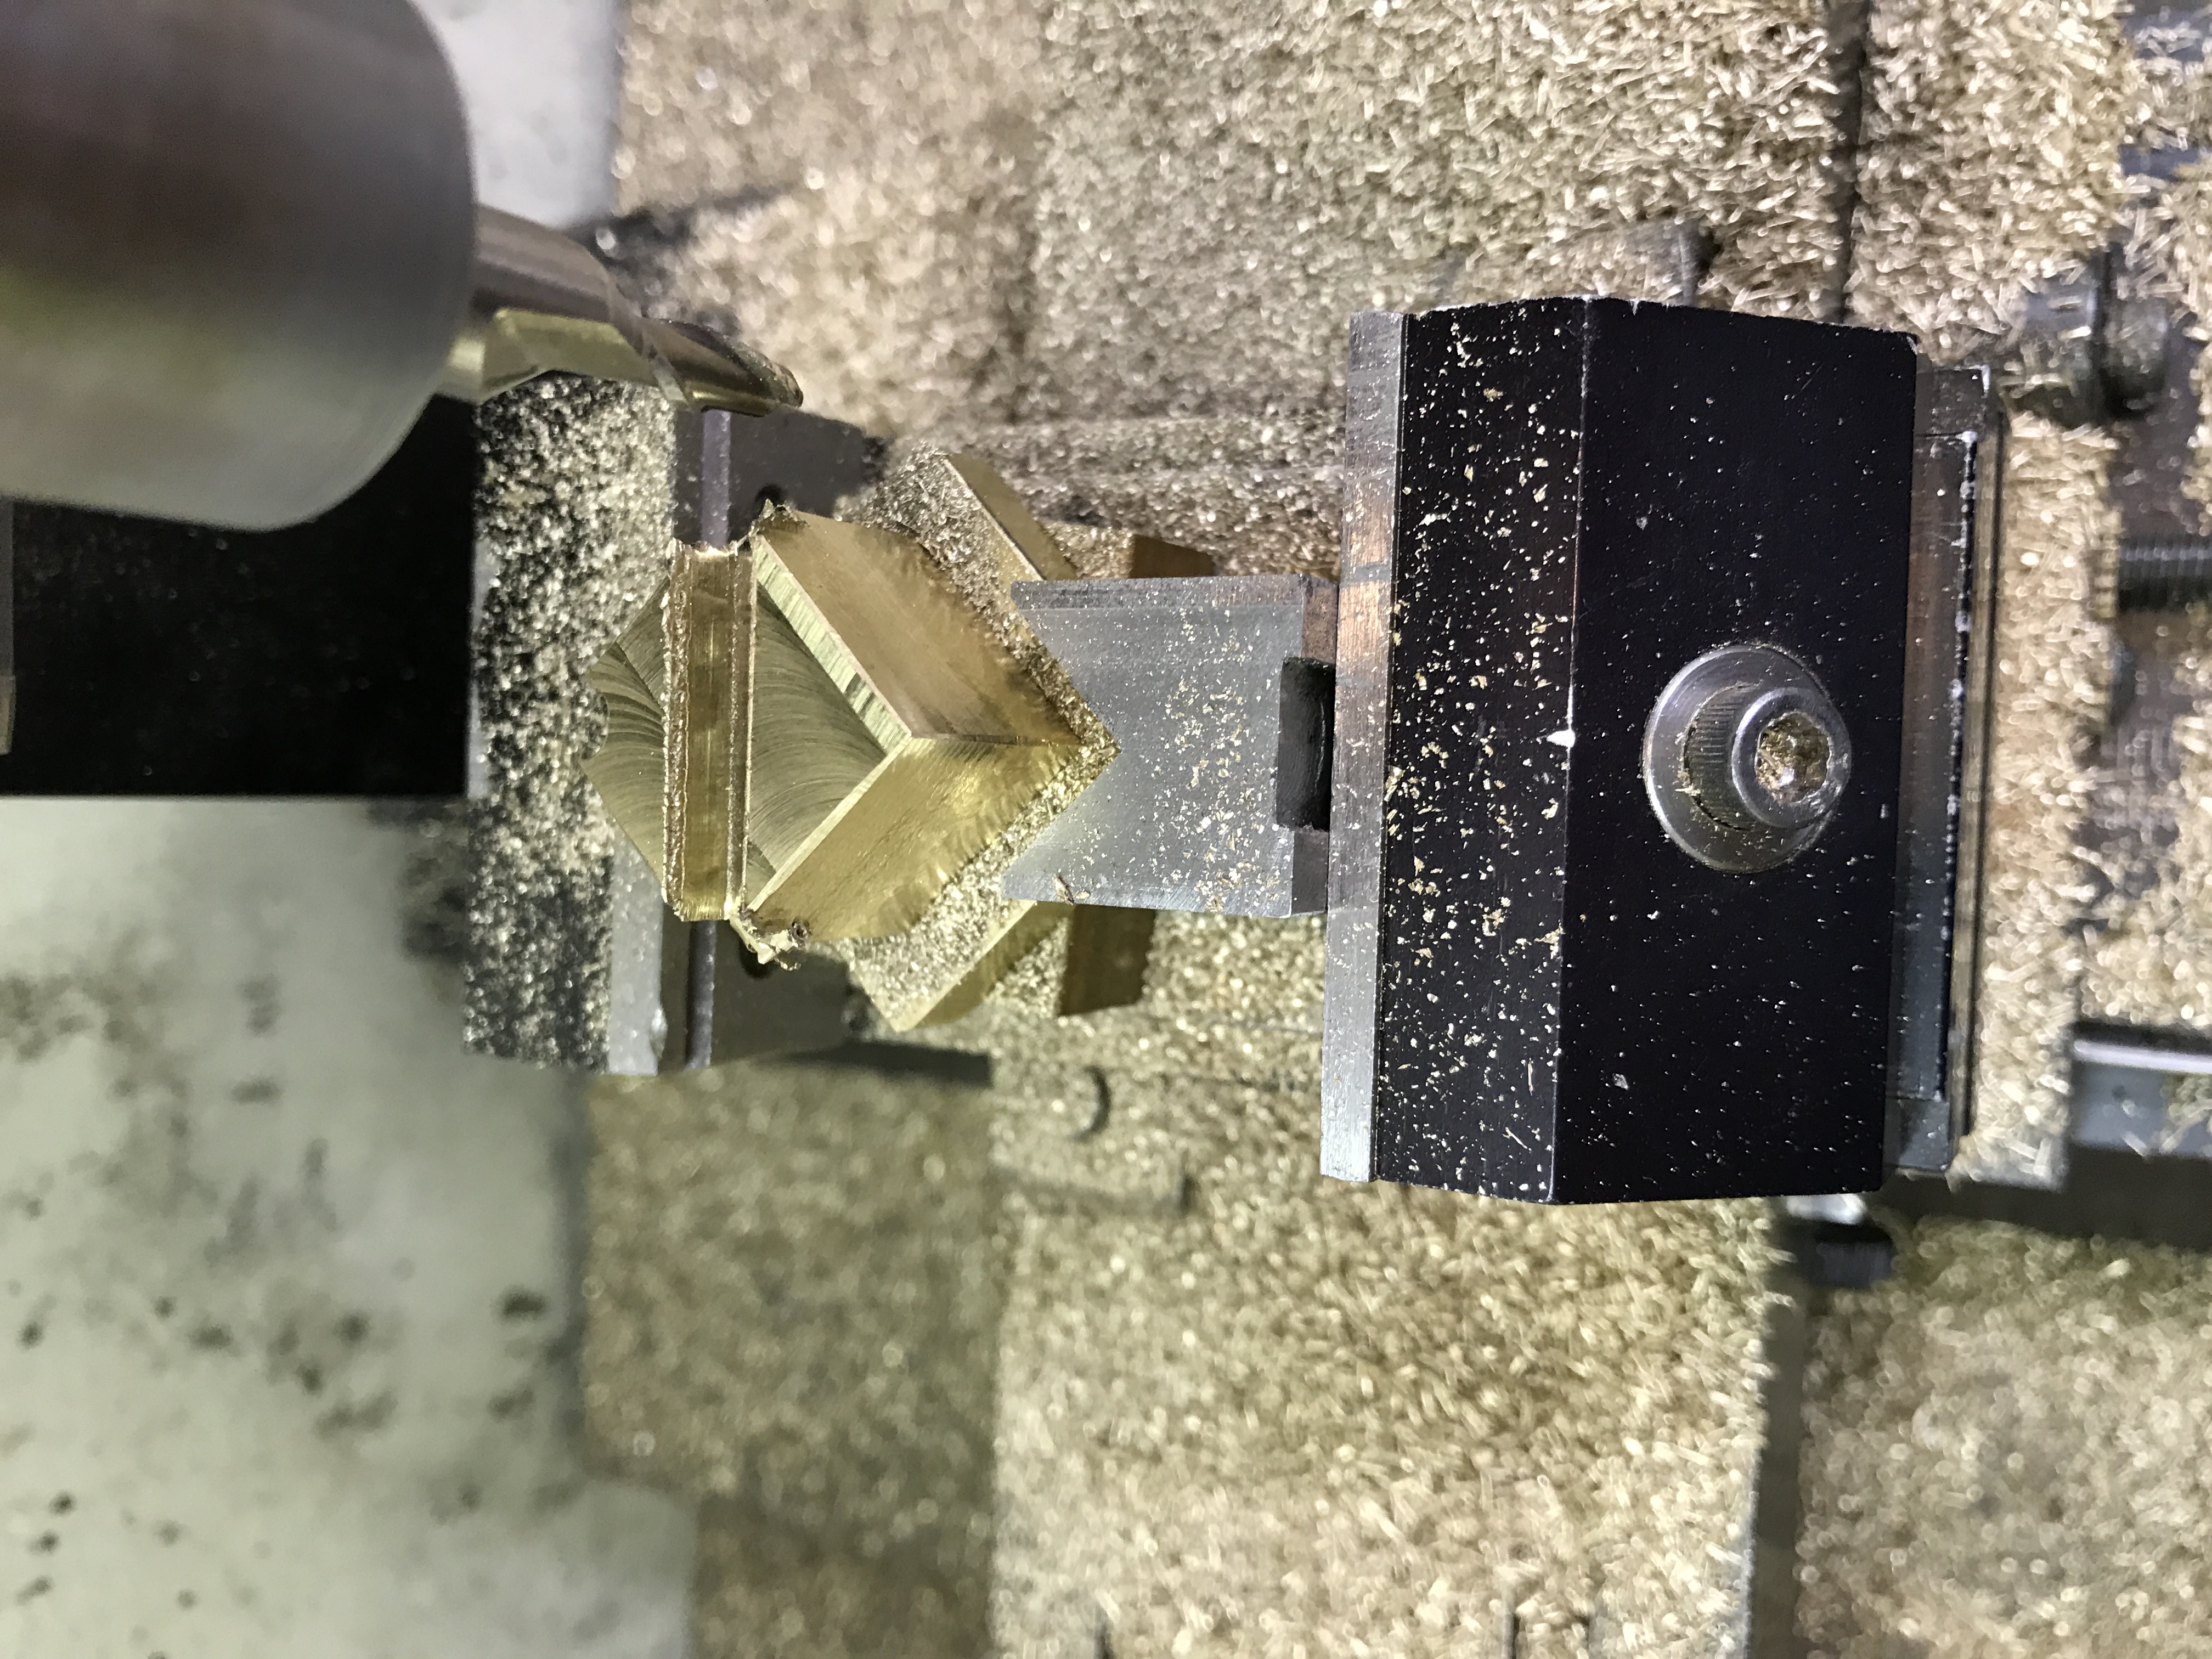
Before completing the sides the 5/16" hole should be drilled in one of the blocks. If the hole is drilled after completely milling a corner, the drill will probably wander and the hole won't be straight. The edge of the hole should align with the corner of adjacent milled sides. The center of the hole is at least 0.254" in from the unmilled adjacent sides.
A thought occurred to me at 4 am. The slot in the 3/4" square that will hold a rod needs to be 1" long at its corners. The diagonal on a 3/4" square is 1.06" long. This is not long enough to hold a 1" rod as the corners will stick out and interfere with the sides of the enclosing box. The math says the sides of this slot will be 0.8725" long. So the rods need to be < 0.87" long. The box will need to be shortened a bit for the puzzle to work.
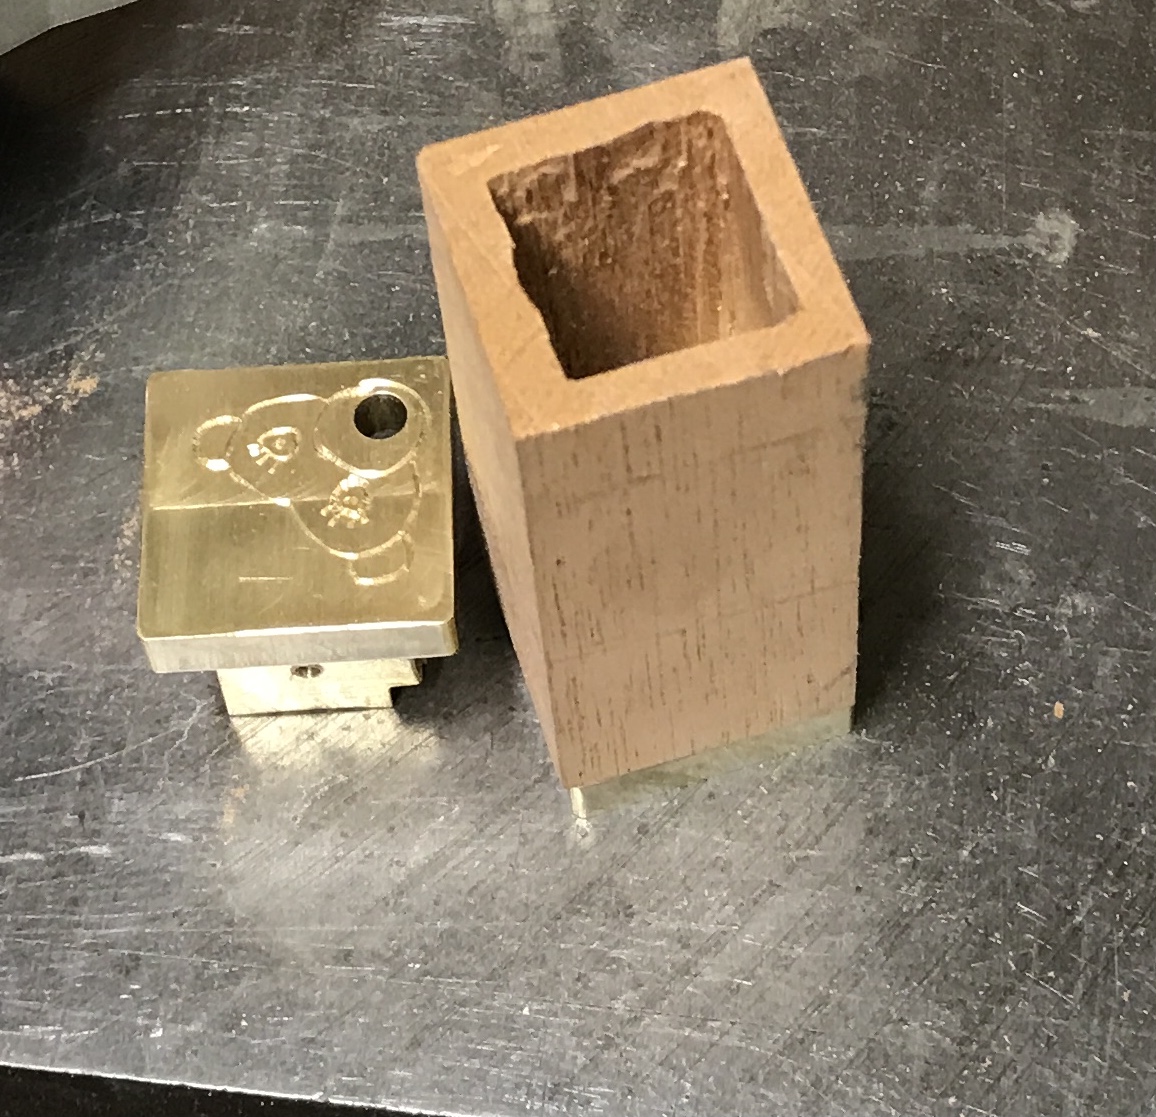
The top of one block was marked out for a hole at 0.254" in from both sides. A through hole was carefully drilled with a #12 (0.189") drill. The second side was milled in the same way as the first. This took over an hour so the last two sides were cut first with the hacksaw and then milled to final size. My hacksaw work was not perfect, but gave acceptable results in the end as seen in the photo below. All edges were deburred. The milled part of the blocks are 3/4" cubes and the lip is 1/4" thick and 3/16" deep.
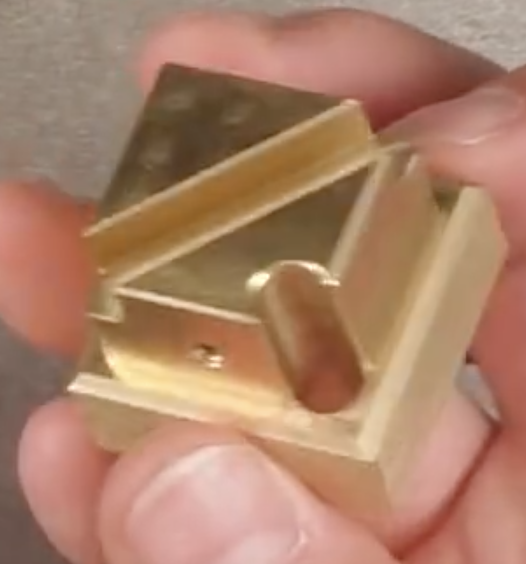
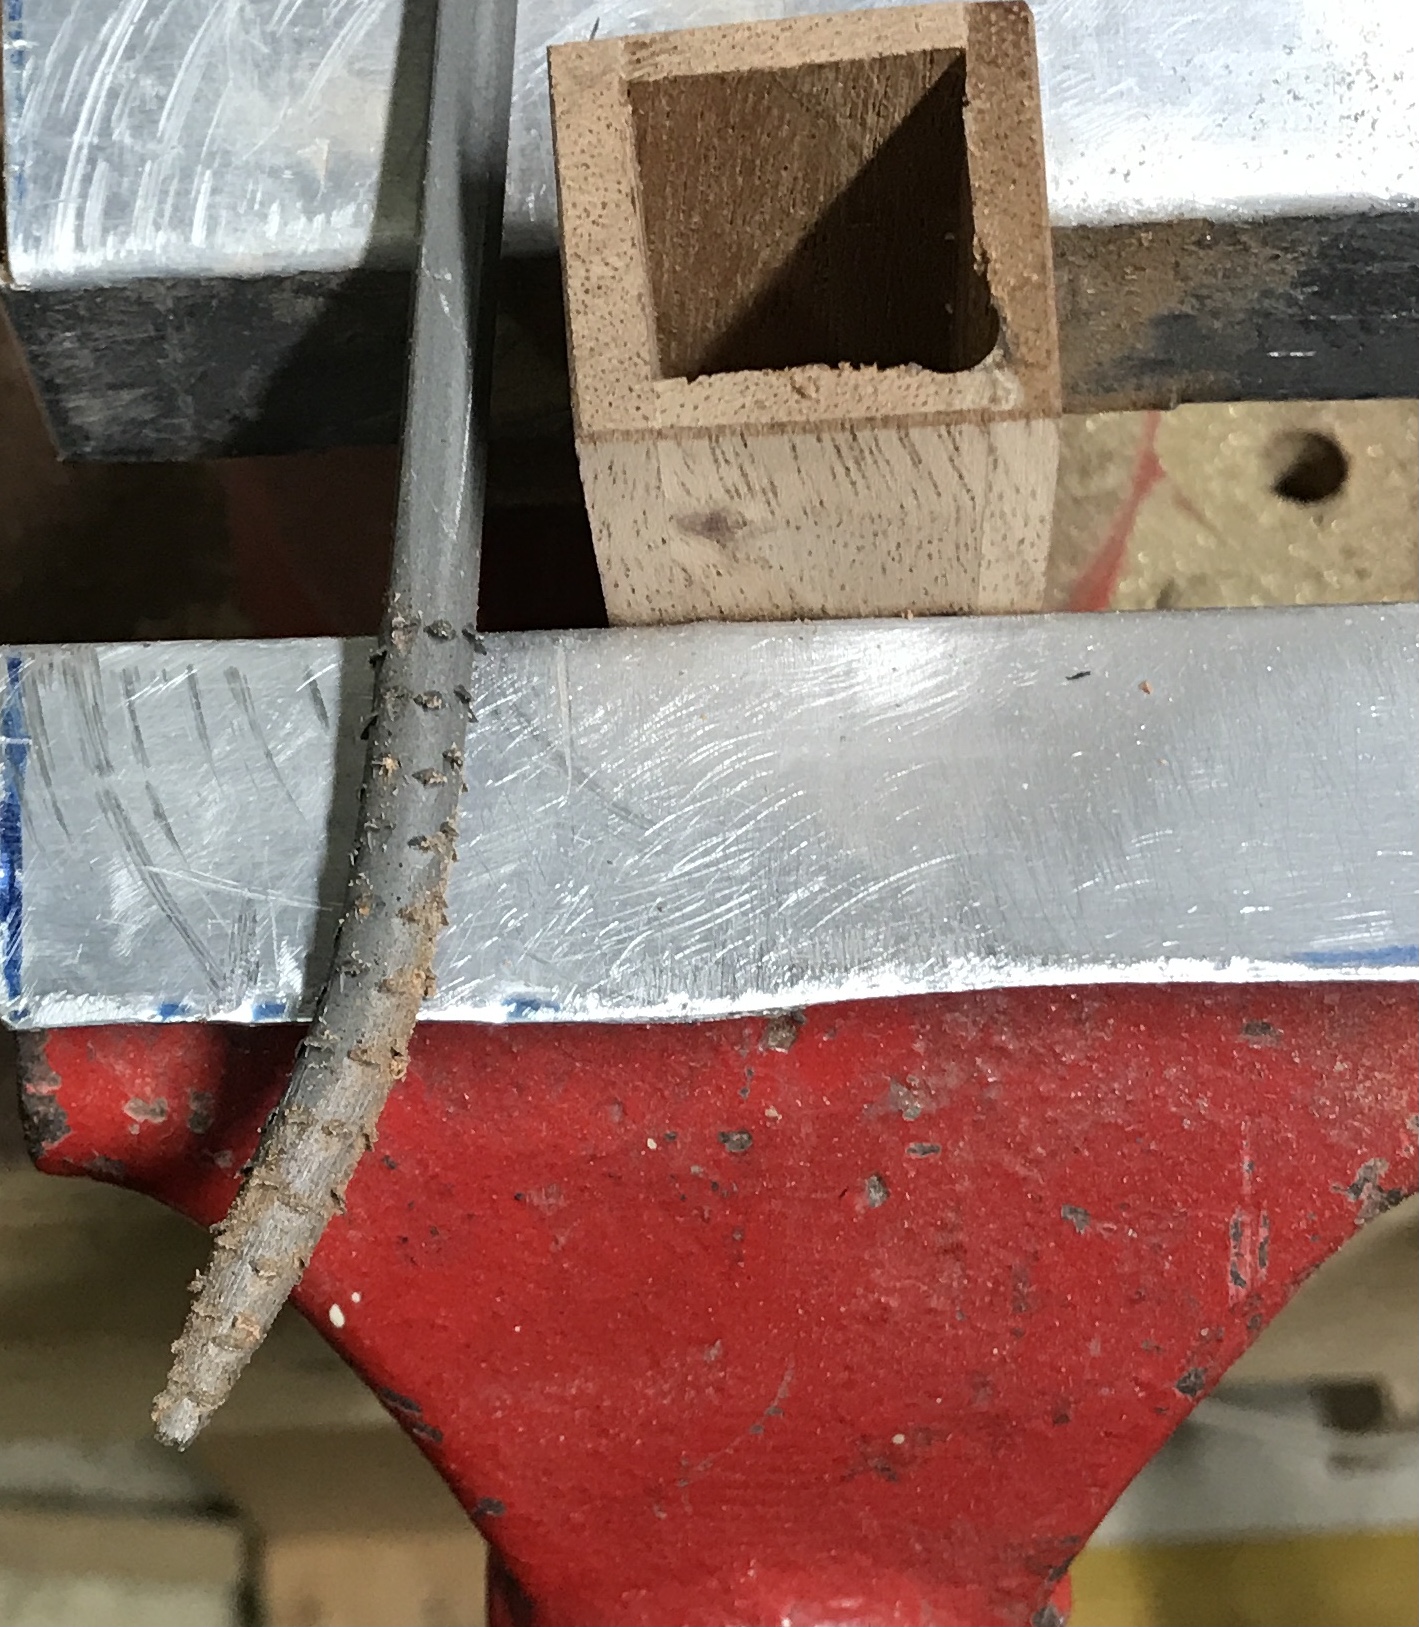
The block with a drilled hole was returned to the vise. One corner was held in a Vee block and the opposite corner fit in the Vee slot in the fixed jaw. The block was also placed on a 1/2" block to raise the top sufficiently for slotting. An edge finder was used to align the spindle with a corner adjacent to the drilled corner. A 3/16" end mill was placed in the collet and the slot was milled to a depth of 0.190" in increments of 0.010". A scrap of 3/16" brass rod was a tight fit in the slot, so it was widened about 0.02". The burrs were removed.
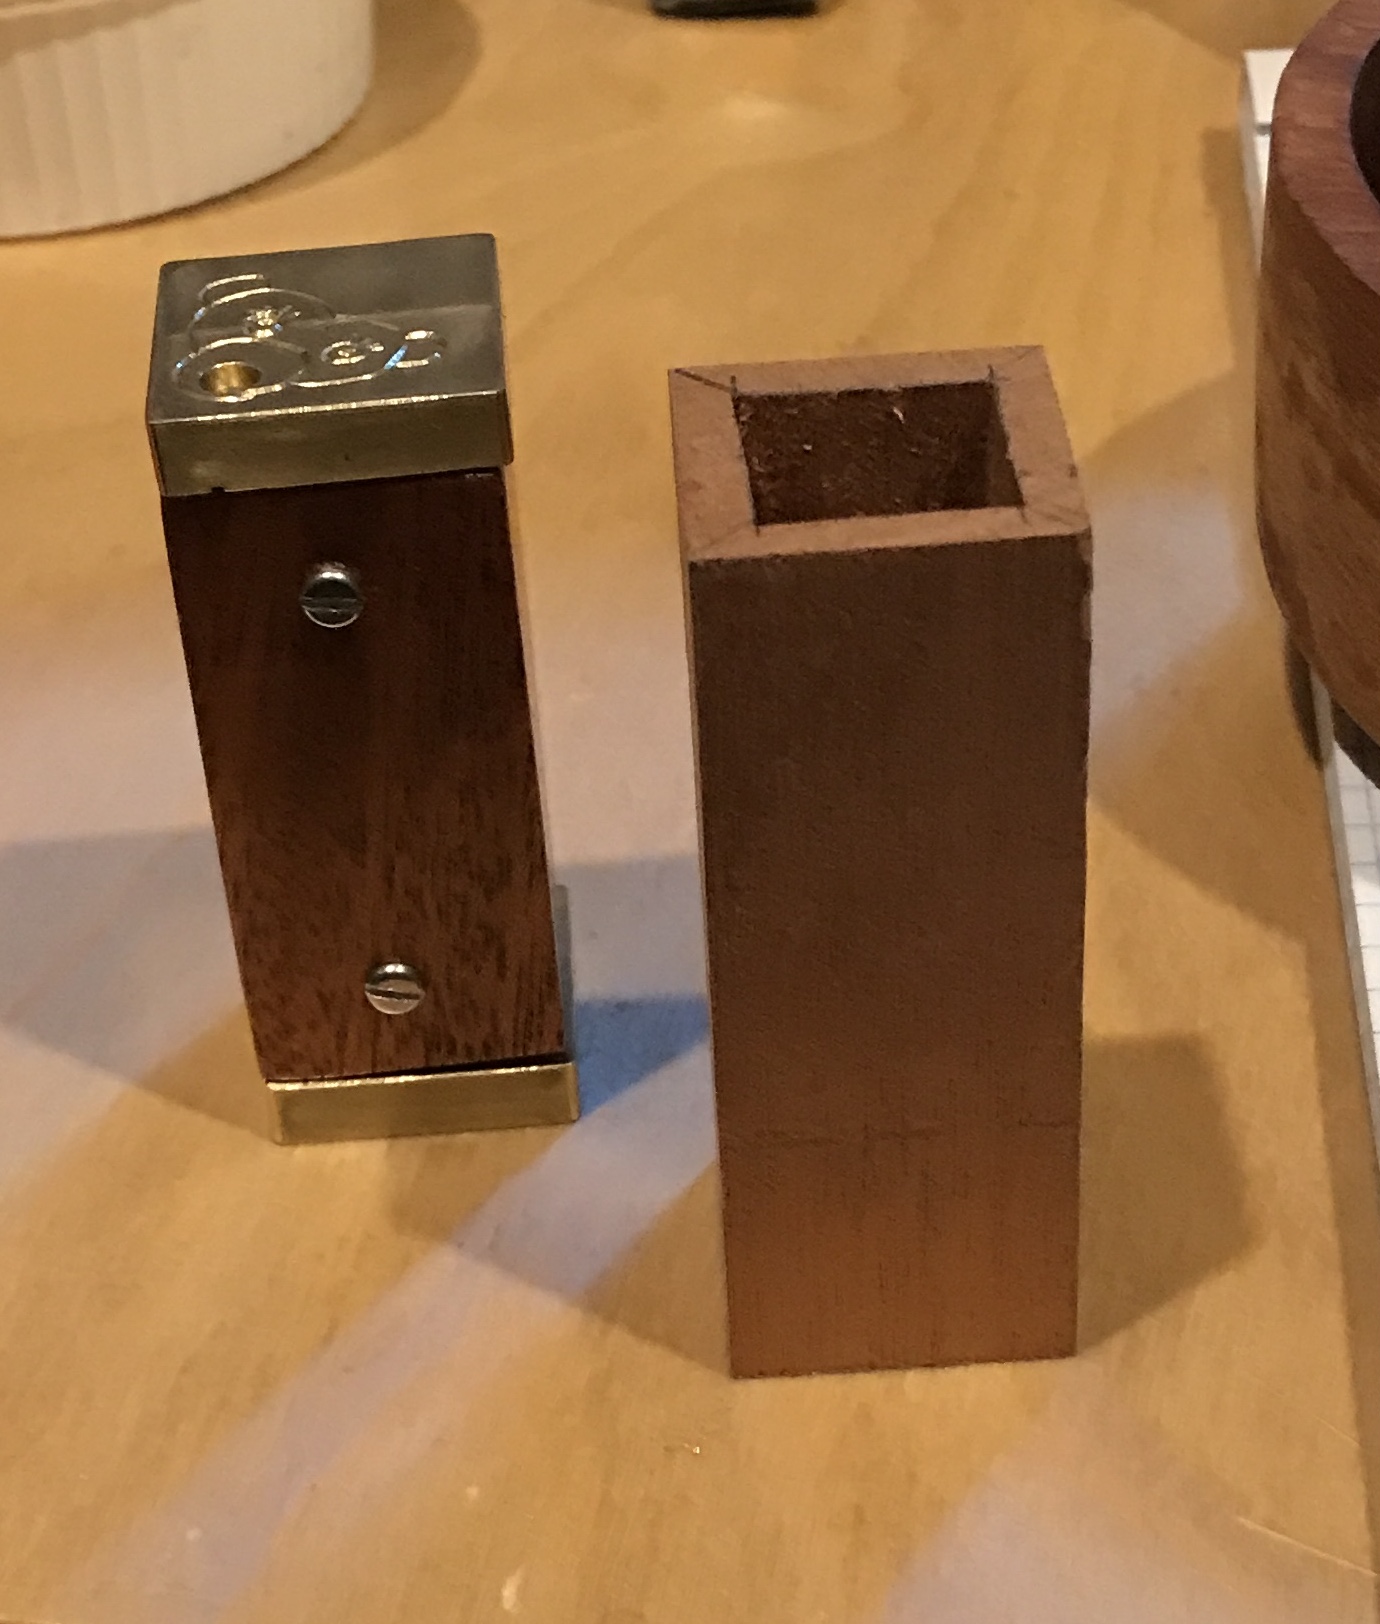
The box needs to be made. A 4" length of scrap was cut into four 3/16" thick slabs. These are about 1 1/4" wide. Two of these were cut to 3/4" width. The four sides were glued around the two end caps using simple butt joints. After ten minutes the end caps were removed so as to avoid gluing them in place.
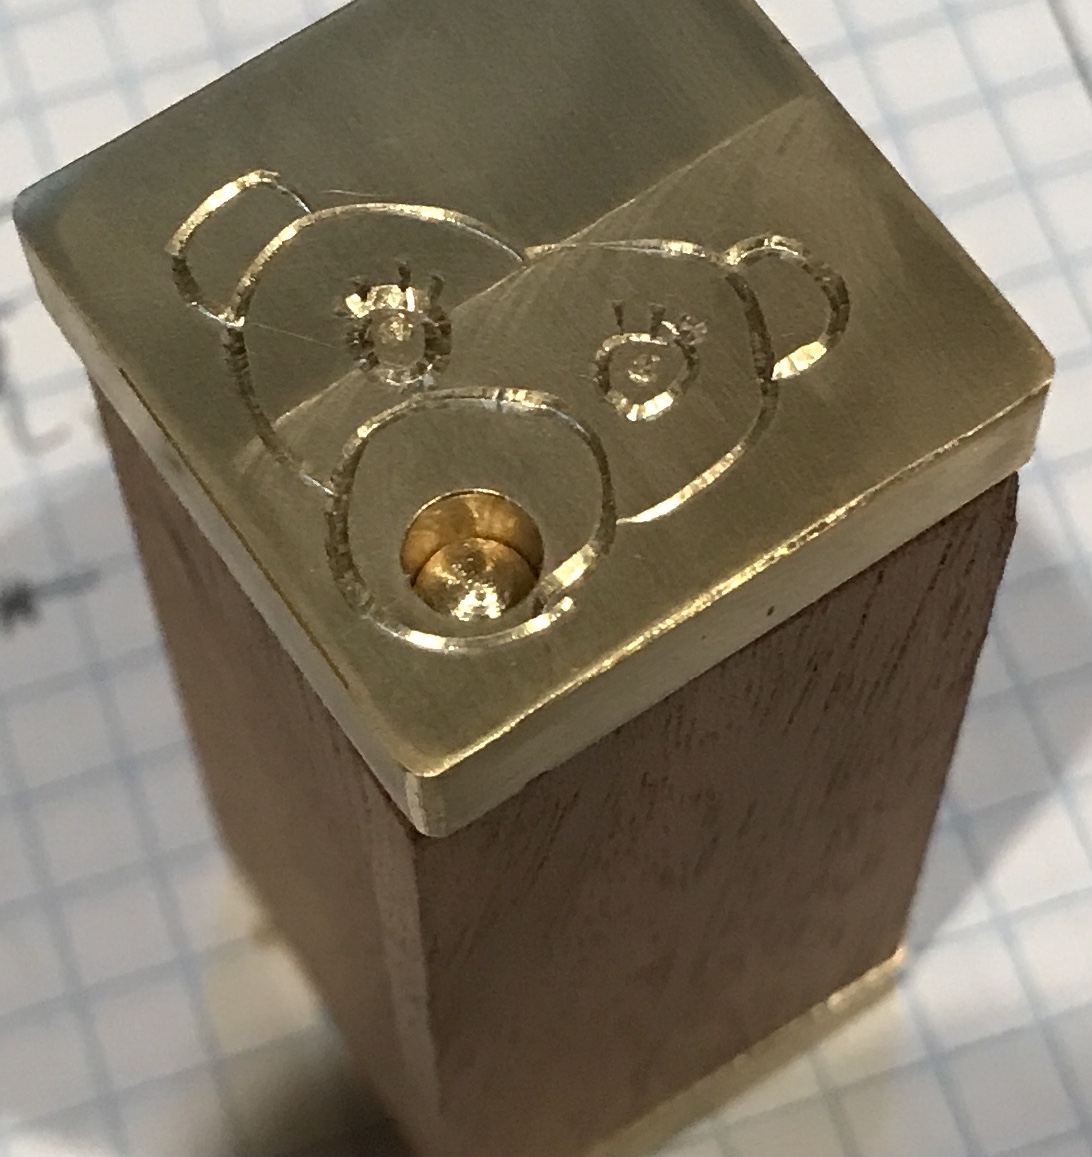
The top cap was coated with China white. The monkey design was sketched on the white. The monkey was engraved in the top around the drilled hole per the screen grab above. All of the outer faces and edges were sanded to 2000 grit. The bottom face was polished on the buffer.
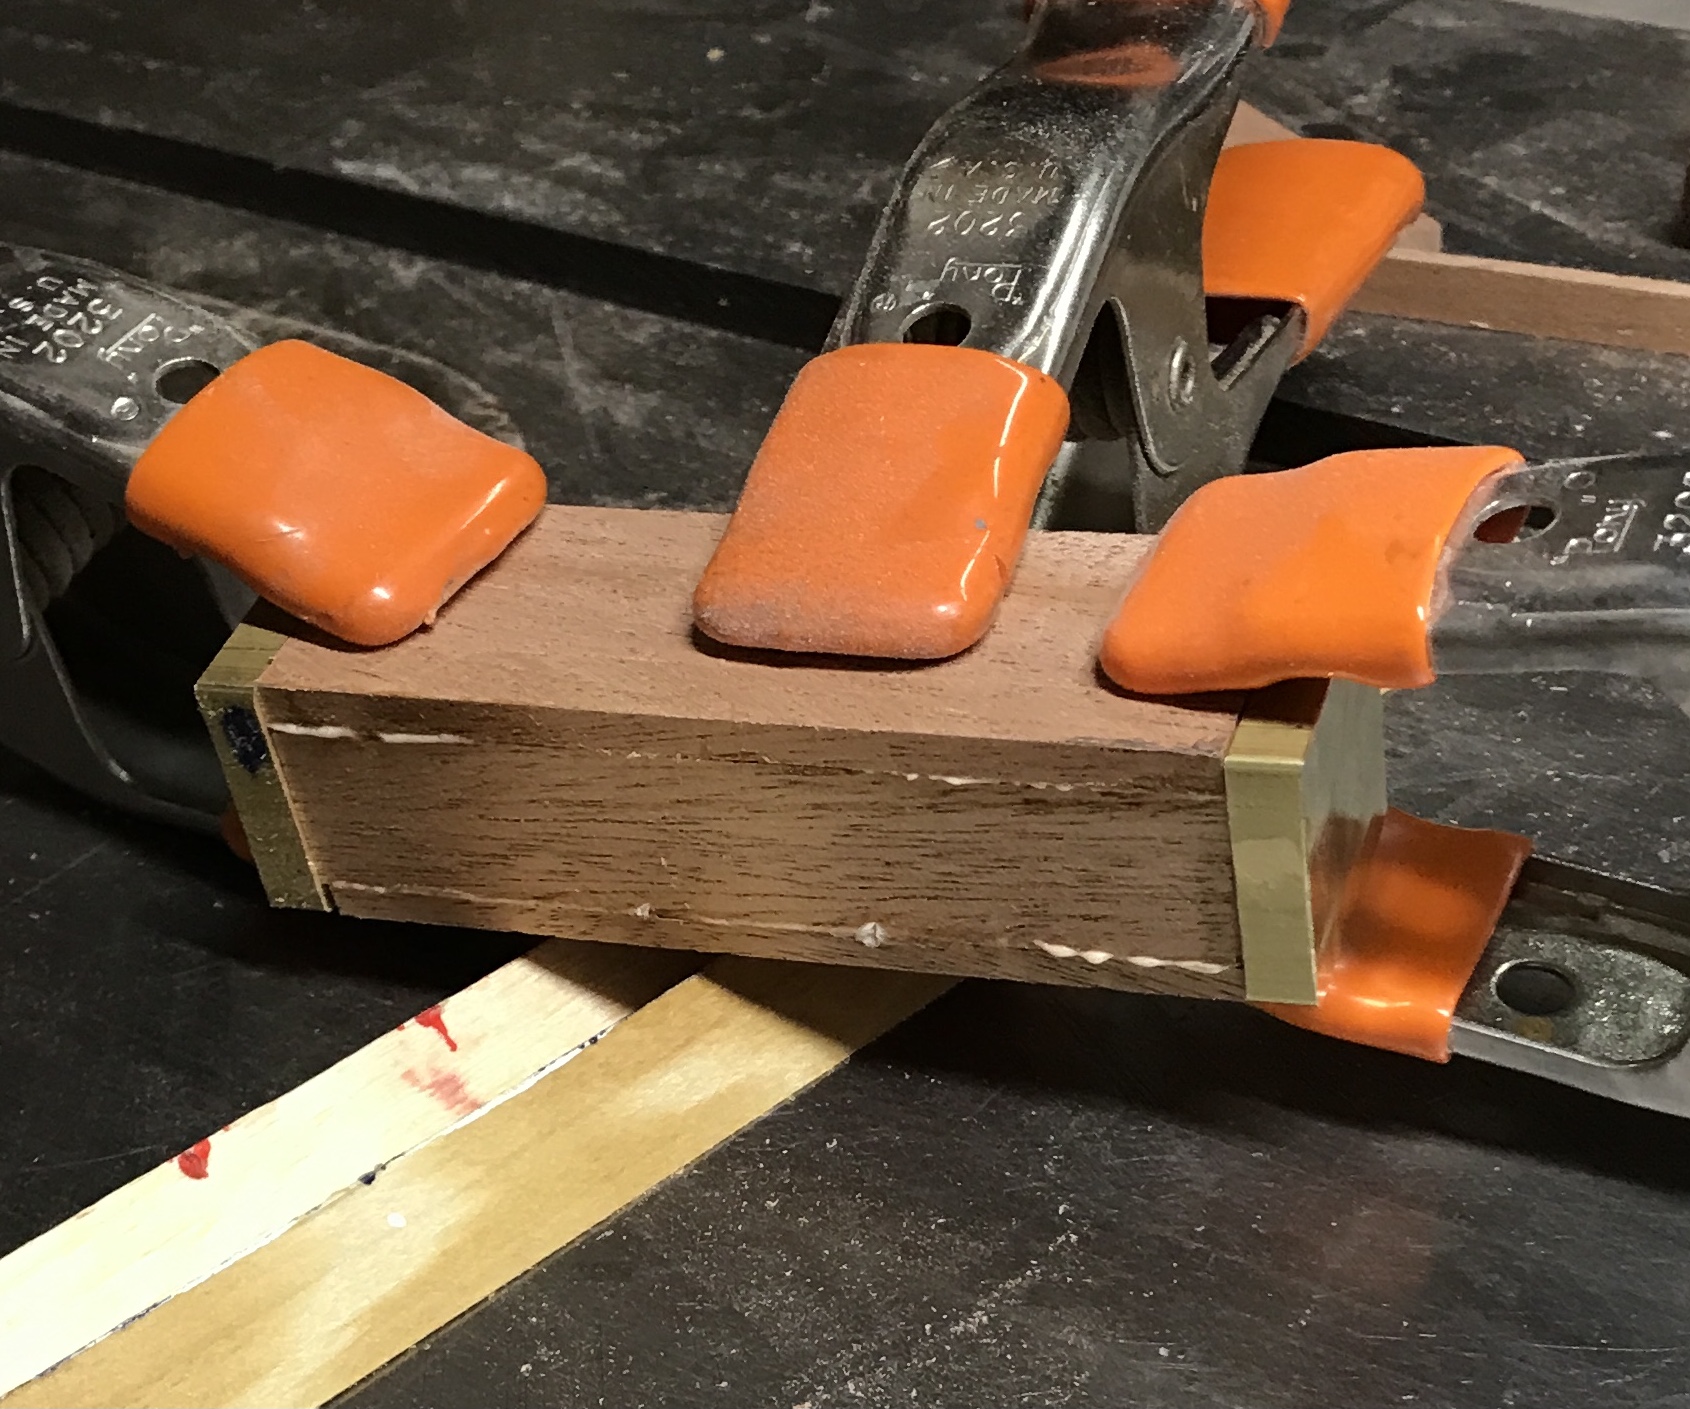
The box was sanded to bring the sides flush. One end was marked for the top cap. It had the least to remove for the hole. The box was marked at 2 7/16" and cut with the Japanese pull saw. The ends were cleaned up and glue was removed from the inside corners. The assembled box is shown below.

The box and caps need to be drilled for screws. The wood and the brass need to be finished. The "bananas" need to be made. That will be done first to make sure everything works as planned.
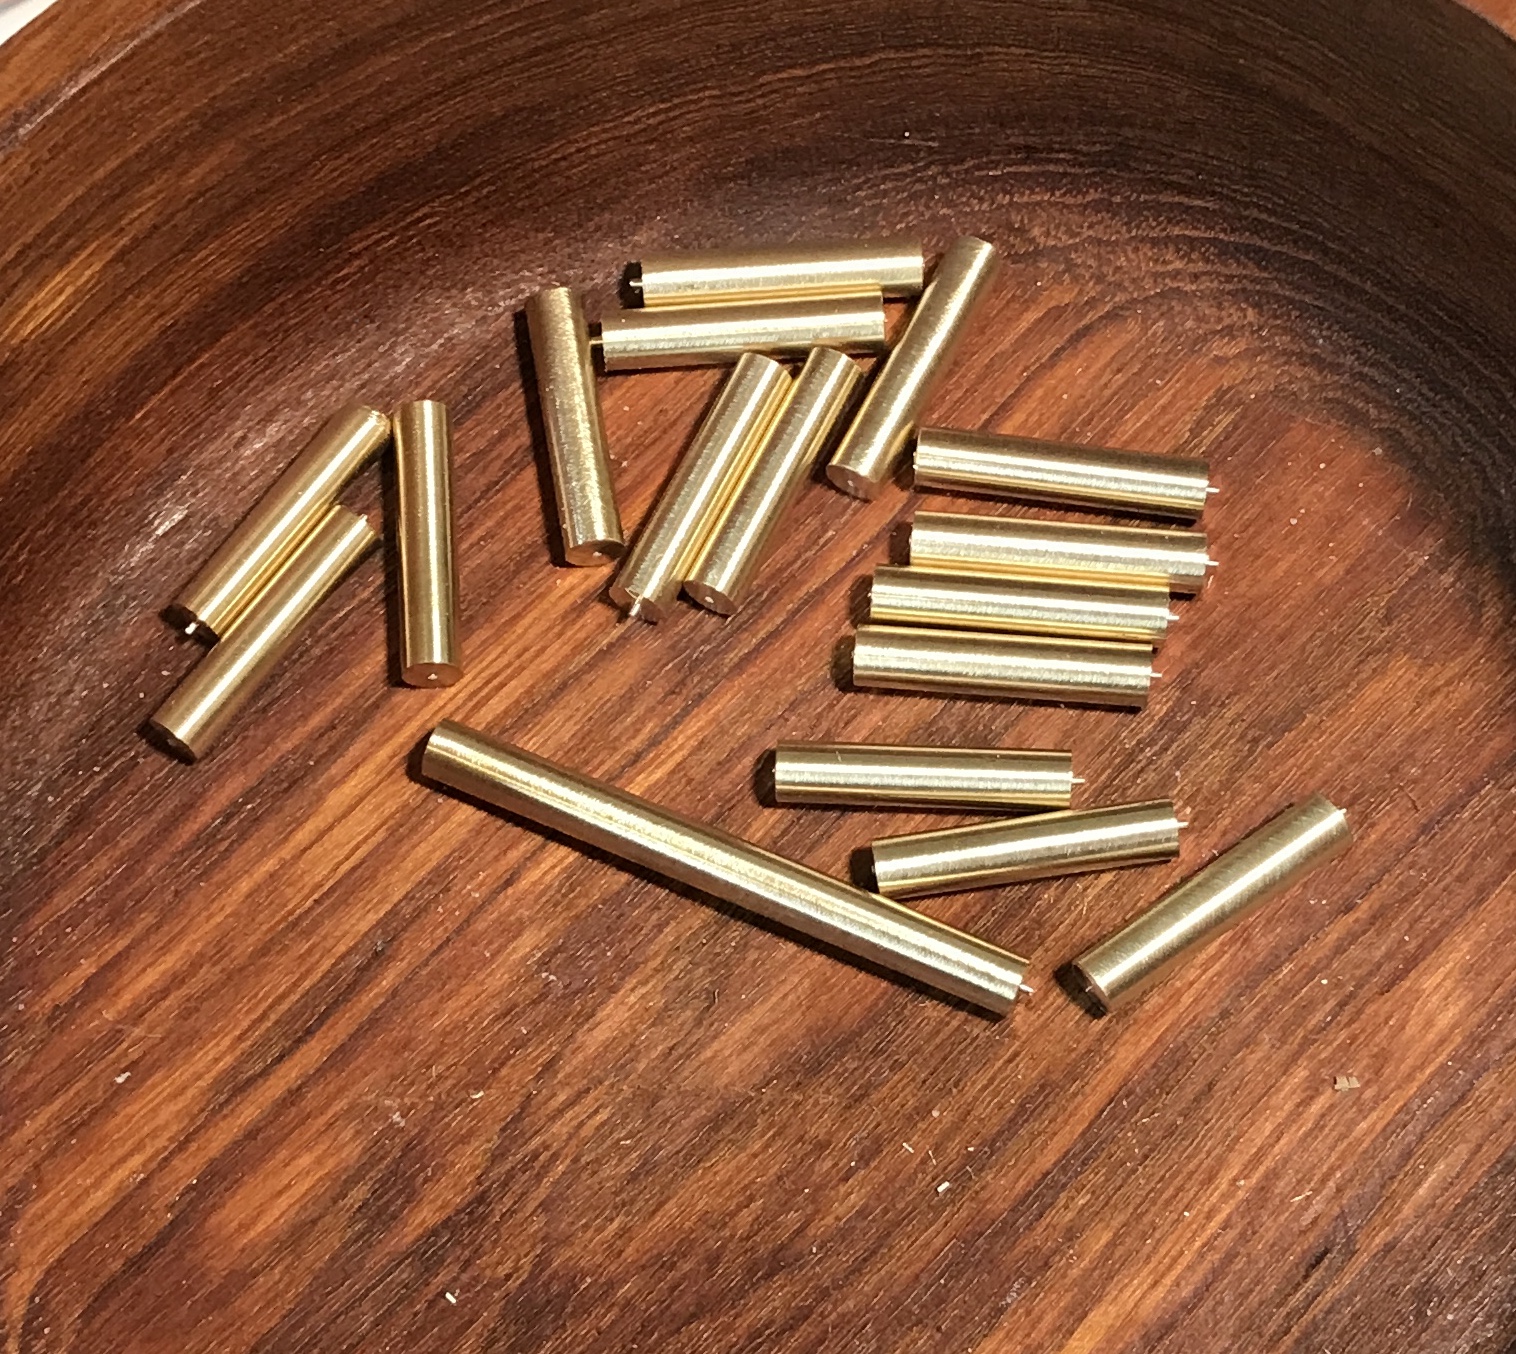
A 2+ foot length of 3/16" brass rod was held in the three jaw chuck. An outboard steady rest (my hand) was used to keep the rod from whipping around. The first end was faced. An inch of the rod was sanded and then parted off at 0.875". The rod was moved out another inch, sanded and parted at the same length. This was repeated until 16 rods were produced. The last rod was made similarly, but 1.875" long. The photo below shows the rods cut to length.
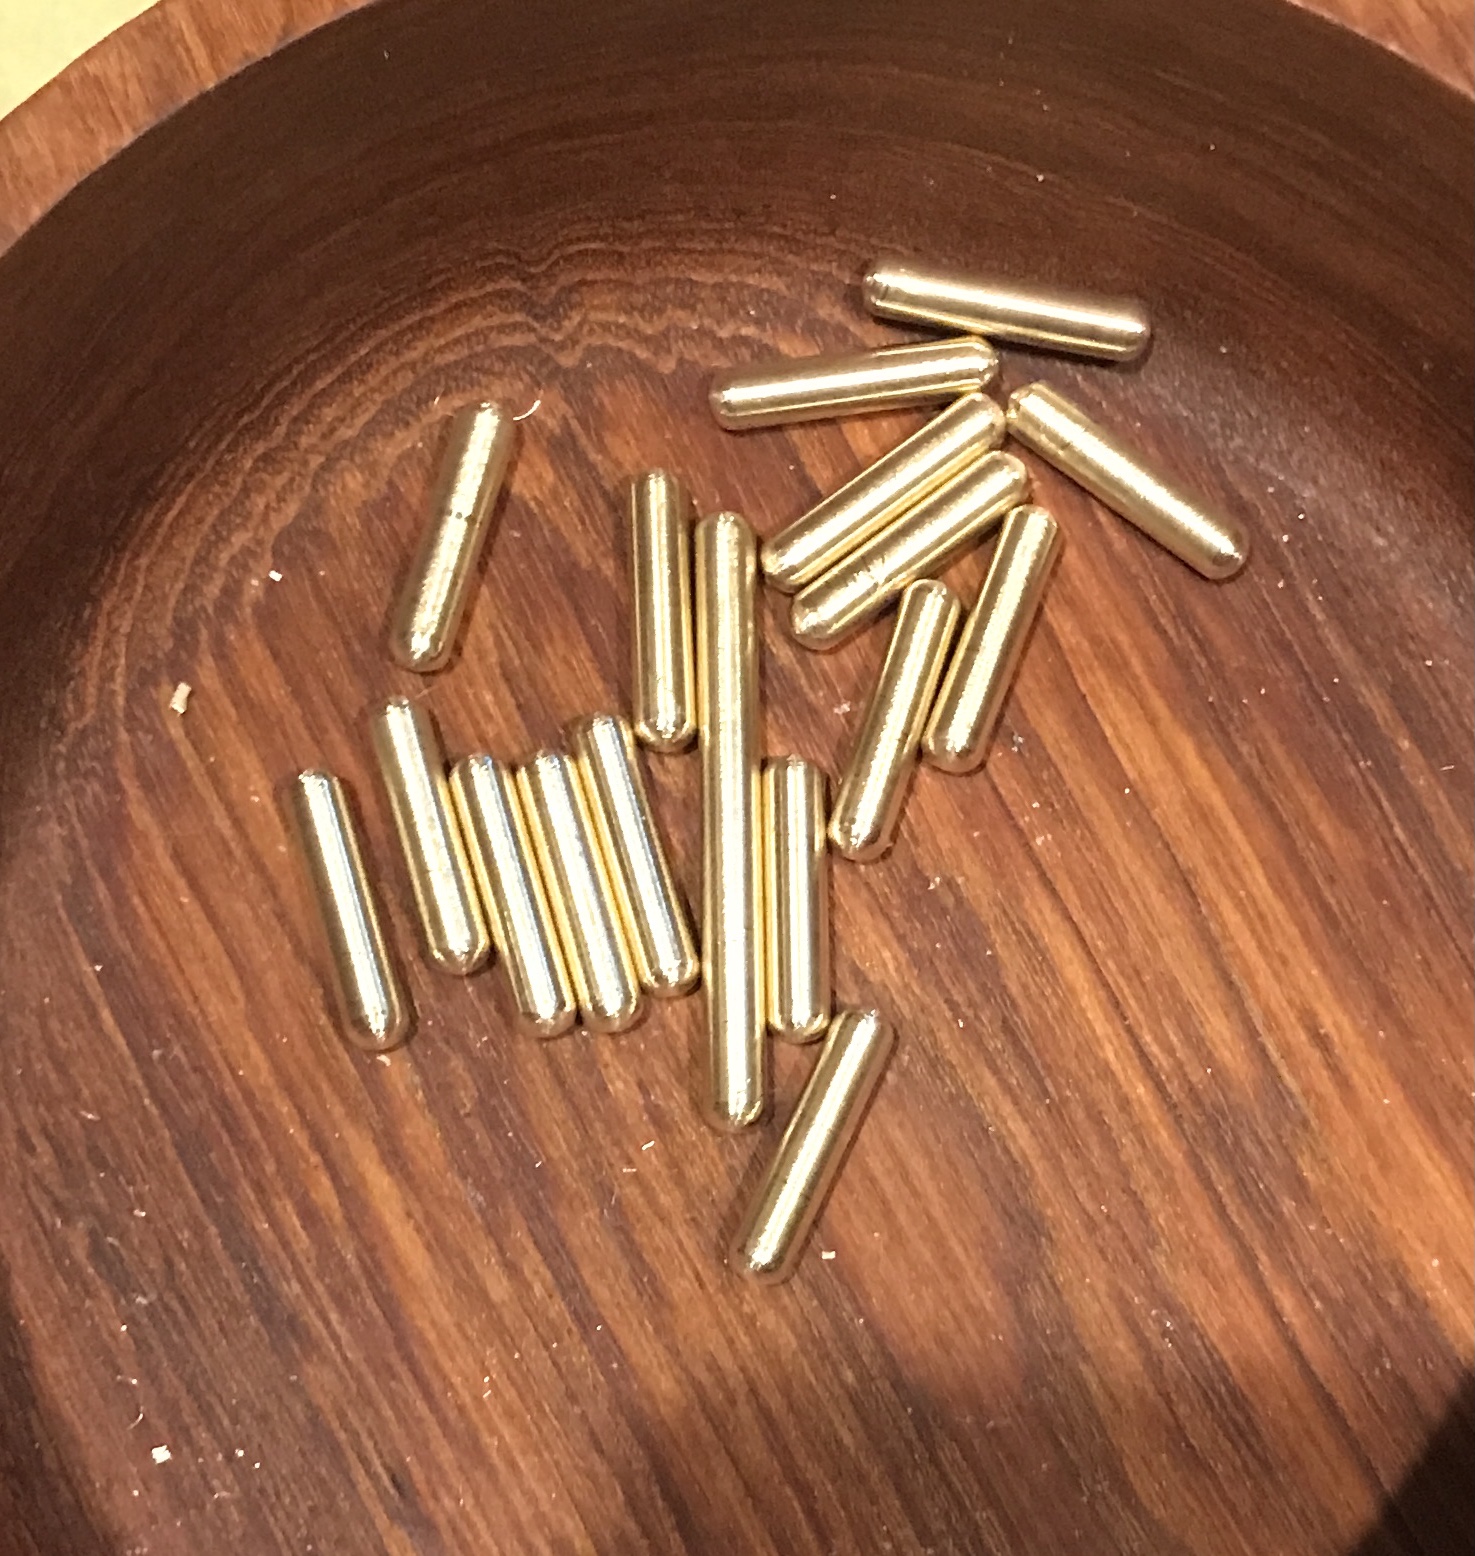
The ends of the rods were rounded. A rod was held in a collet and the end rounded with a file. The coarse side was followed with the fine. The longer rod was also held in the collet. This filing was accompanied with chatter as expected for the 1" overhang. All 34 ends were quickly rounded as seen in the photo below.
The monkey's mouth overlaps with the wood in the corner of the box. This has to be cut away to foster banana ingestion. The first photo below shows the corner marked for cutting. A round rasp and round files were used to open the corner until the long rod slipped right through. The banana consuming ability of the monkey was put to the test. It is very difficult even knowing the trick. The bananas when added are supposed to stack. This can be accomplished, but requires care during the insertion. Shortening the box might improve the banana alignment. Getting the bananas out is almost as difficult as putting them in.
The long rod is a little over 1/16" below the opening of the mouth. The box could be shortened by 1/16" and things should be better at staying aligned. Rod misalignment was found when having difficulty inserting all of the rods. The box was shortened by sanding. The rods align better, though it is still a very challenging puzzle.
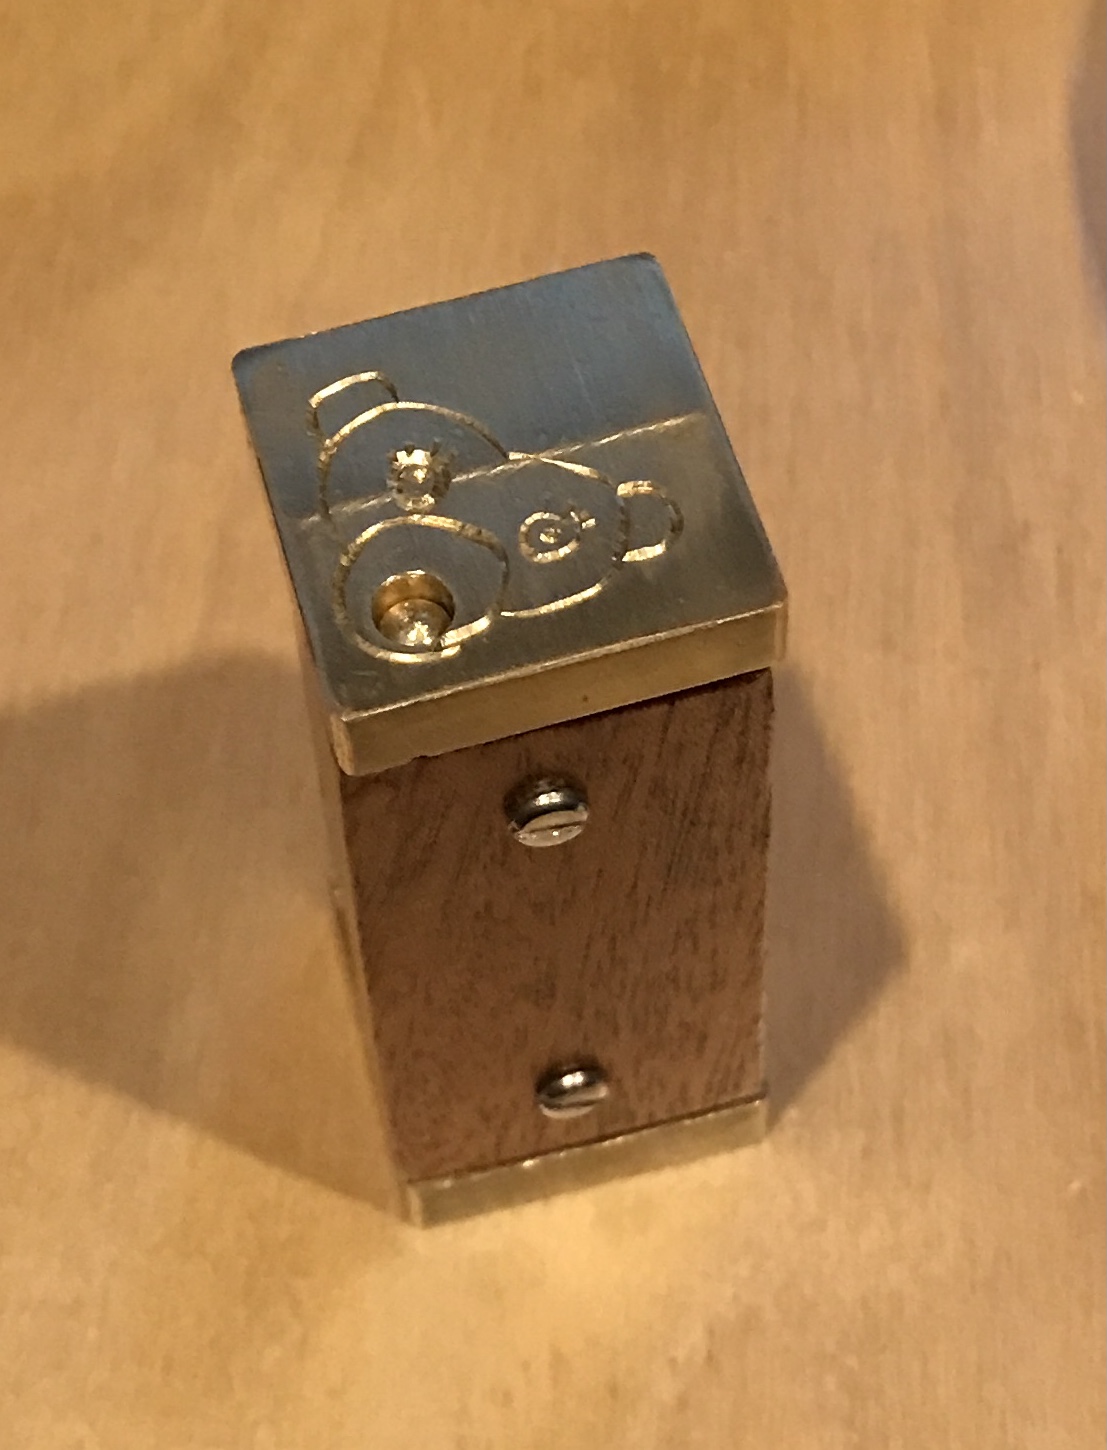
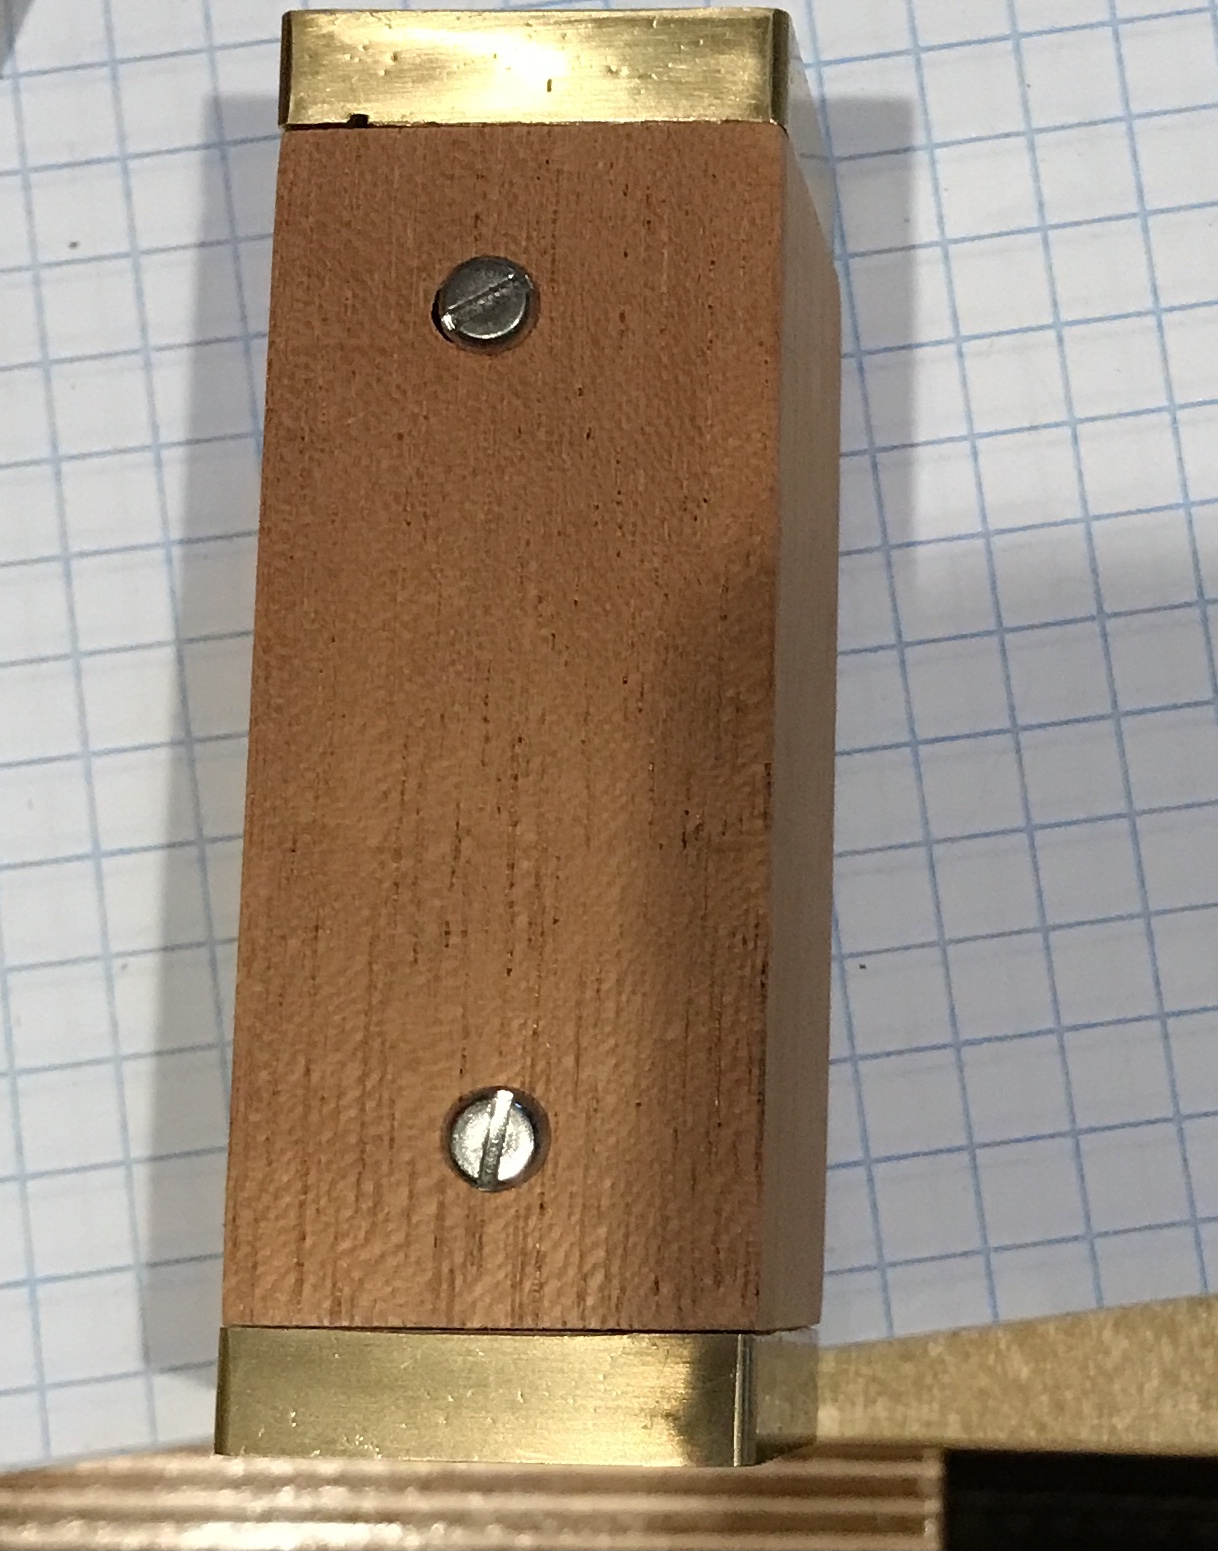
The caps were painted with Protecta-Clear and the box (after sanding to 320) with lacquer. Four 1/2" long #4-40 round head screws were located in the screw hoard. The puzzle was assembled. Four holes were marked on center 3/8" from the end of the wood. The wood was drilled with a 9/64" drill bit and the brass was drilled with a #42 drill. The four holes in the brass were tapped with a 4-40 tap. The screws needed about 1/8" removed. The assembled puzzle is seen below.
The challenge with this puzzle is that the bananas tend to get stuck at an angle upon insertion. Once stuck they can be recalcitrant to properly aligning. This is probably because the length of the rods, 7/8", is too close to the width of the box. Longer rods would fix this issue. Longer rods necessitates making a new box.
I used a differenet approach for the box this time. A scrap of redwood or cyprus was found and cut to 1 1/8 X 1 1/8 X 3". A 3/4" spade bit was used to drill in from both ends producing a round hold through the block of wood. A 16 mm chisel was used to remove material from all four corners on both ends. A bit of adjustment was needed for the caps to fit. A corner was chosen and filed so the long rod would smoothly slide through the opening in the top cap. The box was then cut to length at 2 9/16". This give a 1 1/16" inner box for rods.
While sleeping on the project I realized the error I made above. Moving to longer rods is not possible, considering the slot that one of the rods must fit. I don't know if careful calculations would help with the rods sticking at an angle. An alternative is the smoothness of the inside of the box. In any event I can't really explore either, so I will use one rod slightly shorter than the others.
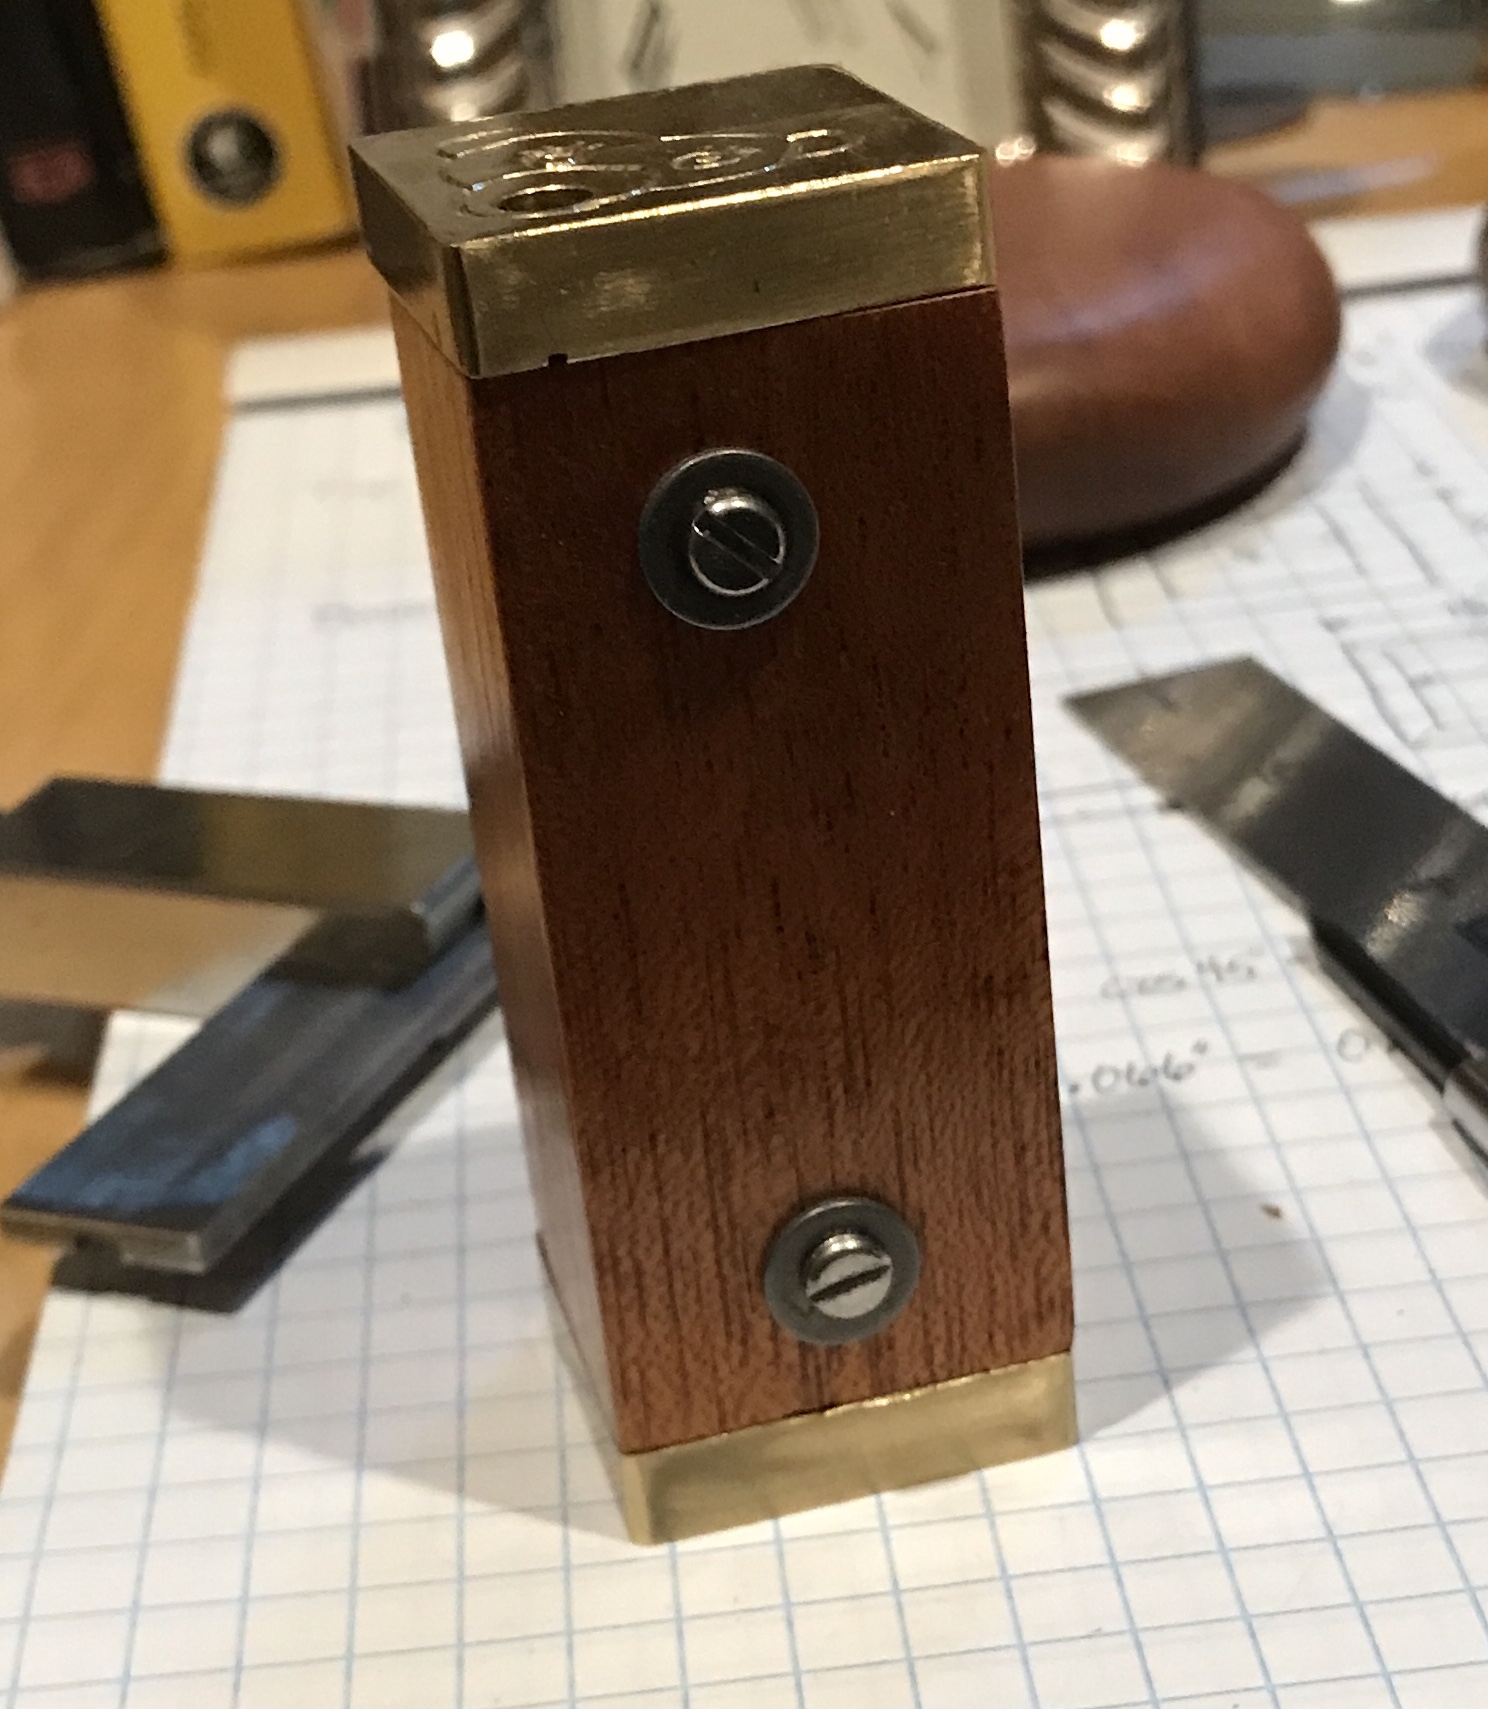
The box was marked and drilled. The two holes for the top cap screws needed some adjustment with a file so the cap was not held too far off center. The box was sanded to 320 grit. The caps screwed in place are seen below. Looking closely to the left of the top cap screw shows the "hole correction". Washers may be in order.
Lacquer is again my finish of choice as it is so simple. The box with the caps removed had two coats of semi-gloss lacquer applied. The box was put together. There was a bit of friction between the walls and the long rod, so a bit more material was removed from the entry corner. Fifteen new 1" long rods were made on the lathe. An old shorter rod was added to this bunch and the puzzle now works flawlessly. Below are the bananas (minus the short banana) and the hungry monkey.
Monkey doesn't like disgorging the bananas as much as it likes eating them!